Sewing Challenge: On Trend, Summer

Standard


20140627_094325

The Facts

Fabric: thrifted t-shirts

Pattern: from YouTube videos

Year: 2013

Notions: embroidery floss, bamboo skewers, spray paint, thread

Time to complete: I don’t remember

First worn: N/A

Wear again? No

Total Cost: Used items from my stash, so probably under $10 for everything.

I know that after the last post I haven’t really been available online. Turns out that it takes some time getting used to and settling into a new life. I had forgotten what it was like working a 40 hour work week and what it means in relation to time for everything else. Basically, there is none. I go to work in the morning, then I come home, eat dinner, unwind a little and then I realize that it is time for bed. Since moving into my new apartment, I have not been able to organize my creative space at all because I have too much fabric to be able to, well, to do much of anything. Also, I have found that I have a bit of a social life. It seems that people like me and want to spend time with me. Since hanging out with other people is more enjoyable than cleaning, I have been choosing to spend time away from home. I’m hoping that in the future, I will be able to find the balance and be able to do it all, but I get the feeling that is something that everyone hopes for and few achieve.

What this means is I am going to be blogging about some of the things that I have made previously, and counting it as though I made it this year. For this week, I am doing four things in one post.

About this time last year, Threadbanger had a contest of sorts that was inspired by summer camp crafts. If you made the items that they showed in their YouTube videos, then they would mail you a patch showing that you made the item. They did a tie dye, a friendship bracelet, a God’s eye, and a t-shirt reconstruction. I had mostly forgotten that I had done the projects, but one of the items, the tie dye shirt, surfaced.. I was pricing things that I am going to be selling at my parent’s yard sale, and I came across the shirt. I showed it to my mom and she really liked it. She actually liked it so much that she claimed it as her own shirt, which was actually a good thing as I had run out of hangers for the clothing for sale.

IMG_20130831_153750

The friendship bracelet that I made for the contest was actually the first friendship bracelet that I had ever attempted to make. I knew many friends in elementary school who would make them, but I never took the time to learn. Thank goodness for the tutorials on YouTube. My bracelet isn’t perfect, but it isn’t terrible for a first attempt. I don’t think I ever appreciated how much time goes into them, and because of that, it is possible that I won’t be making another one.

IMG_20130831_153118

The t-shirt reconstruction that I did was to take a t-shirt and turn it into a tube top. I try to avoid wearing tops that require faith to stay up. I did the reconstruction because it was the example given. After I followed the tutorial, I saw that I could have done any of the t-shirt reconstructions that Threadbanger has a tutorial for. I am pretty sure that this shirt ended up going to the thrift store, but I may have kept it because I like the olive drab color.

IMG_20130831_153322

The God’s eye was pretty quick to do and used up some embroidery floss. I picked some colors that looked pretty together and were at the top of the pile of embroidery floss. The only downside was that the floss had already been cut so I had to tie the end of one string to the beginning of the next more often than I would have liked. I used a skewer for the wood base as I have many of them for use with my grill.

IMG_20130831_153518

The tie dye shirt that my mom fell in love with was done using a white shirt from the thrift store and some spray paint that I had on hand. I scrunched the shirt, sprayed it with paint. Then I unfolded it, rescrunched it, and sprayed with the second paint. Then, I shook it out, rescrunched it again, and sprayed it with the last color. I would like to dye some shirts and other fabrics with liquid dye at some point in the future. I have some tie dye kits as well as some dye resist. I have many plans for what I would like to do, I just need to schedule and plan for when I am going to do them. Maybe have a tie dye party? That would be fun.


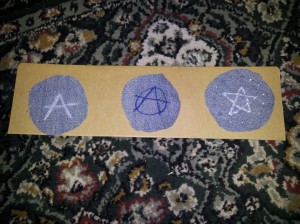
I took the pictures, posted them on Instagram with the appropriate hashtag. I wasn’t sure who to contact with my information, but they contacted me, I gave them my address, and I got my summer camp badges in the mail. I love them and need to figure out what really awesome thing that they can adorn.


Happy sewing!


Week 12 – TV Inspired: Based on a character from TV, past or present

Standard

vyv_cat

The Facts

Fabric: Old pair of jeans

Pattern: Self-drafted

Year: 2014

Notions: Thread, fabric paint, fabric markers

Time to complete: 3+ hours

First worn: N/A

Wear again? I hope so.

Total Cost: Most of the materials I had on hand because I had originally purchased them for other projects. To make this new, it will cost from $5-$20 for materials, depending on if you are purchasing new fabric and if you are buying studs instead of using fabric paint.

Someone had shared an article on Facebook quite some time ago that showed cats wearing classic punk denim jackets. (http://www.buzzfeed.com/sbkasulke/look-at-these-19-adorable-cats-in-punk-vests) I shared the article and asked the general question of what punk jacket would be best to make for a cat and my friend Kevin said Vyv from the Young Ones. Thankfully, this show is much loved and there are many research options available for reference pictures as I did not see the Young Ones as I was growing up. Scandalous, I know. I watched Are You Being Served?, Mulberry Days, Monty Python’s Flying Circus, The Black Adder, Red Dwarf, All Creatures Great and Small, and Fawlty Towers. Oh, and Doctor Who. It was alway fun watching an episode of All Creatures Great and Small and then watching Doctor Who and going, ‘wait, didn’t I just see him?’ But I did not know about the Young Ones existence until much later.

Anyway, this project presented many challenges. As I do not have easy access to a cat for pattern fittings, I had to guess on the sizing and shape for the best fit and cat comfort. My research shows most pet harnesses and jacket type items are kind of hourglass shaped and close in the back. The article shows jackets fitting the cats like they would on a person – closing in the front and pretty much a straight, somewhat boxy shape. Most of the measurements that I could find for cat jackets were somewhere around 16 inches long with a 9 inch neck/collar. So, I measured and I cut 17 inches off of the bottom of a leg of a pair of jeans, the extra inch to allow for seam allowance. I realized that the fabric was very long. I laid the cut fabric on my lap and realized that if a cat were to wear a jacket that was that long, it would probably not make a very good lap cat. Or it would be mad at its humans for putting it in a thing that interferes with the glory of its beautiful tail and would start destroying anything it could, provided it could get over the disdain of moving in such a monstrosity.

So, I cut the giant piece of fabric into two, more manageable pieces so I could make two jackets instead of one. Then I decided which side I wanted to be the front and I cut it straight down the middle. Then I guessed on where might be the best place for the front legs and cut out the sleeves. Then I cut out four collar pieces, using the tops of the jackets as a guide. I tried to make sure that I included the seam allowance, but I made the one too short. Then I sewed everything up. I did a straight stitch on the sleeves to help maintain the shape and to make sure that they will only unravel to a certain point, and I sewed the front of the jacket to create a clean edge and to prevent unraveling.  I sewed the two collar pieces together and attached them to the jacket, for each jacket. For the jacket that I made the collar too short on, I folded the front of the jacket in and hand sewed it down to make everything fit. Then I started the decoration process.

I elected to not use actual studs on these jackets for two reasons. One, I do not know if the cat who may one day wear this will decide to try to chew on the studs. Two, the studs that I was able to find that were not iron on, were $10 for a small box. I think there may be 90 or so studs in the box, but they are of a mixed variety and there is no guarantee that there would be enough of the same kind to complete one jacket. Plus, I am poor and did not want to spend that much money on a thing for a test prototype. Once I perfect the pattern, then I can justify the expense.

20140410_165214

The first patch shows the paint pen after repeated coats were added. It shows up better in this picture than it does in person. The middle one is what the fabric marker looks like. The final one is me practicing with the fabric paint. I painted a star because I was tired of doing anarchy symbols. Bonus: I now have three denim patches for future projects.

Thankfully, I already owned silver fabric paint, as well as fabric markers in various colors. Unfortunately, I could not get the white paint pen to work well, so I used glue. Once it finishes drying, I can attempt the same technique shown in this Instructable: http://www.instructables.com/id/Vyvyan-Basterd-The-Young-Ones-Costume/#step0

There was some conflict in what Vyvyan’s jacket said. The reference picture that I was using said “Love Your Dead,” while the instructable shows his jacket saying “Love You Dead.” I feel that if I had watched the show I would know which one was correct. I’m mostly ok with my choice and too lazy to look up screenshots again. Of course, if I really wanted to make a screen accurate jacket, I would have included front pockets and chains on the back.

Anyway, here are the finished products, as they lay drying. Notice, the one that I made the collar too short on does not have enough room for the words on the front. Should the day come where I figure out the measurements to make a kitty coat, I will make sure that the jacket is more square and less skewed. However, for these I will say that it is entirely intentional. It was surely not laziness on my part. It was definitely an attempt at making the jacket as punk as possible. Right angles are for the man. Don’t follow the rules that society laid down for you. Blaze your own path! And such.  


20140410_164834

This is the shorter one.

20140410_164916

This is the longer one. I’m still worried that it is too long and that it has too much fabric in the front. I’m not sure that an animal that wears this will be able to move easily.


20140411_000007

This is what the little one looks like on a space buffalo. I’m hoping that it will fit an actual cat better, but it gives an idea of how it will look.

Happy sewing!